When working with any of the project repositories for the first time, it is necessary to configure your environment and import the project properly before beginning development. The following steps assume that you will be using IntelliJ IDEA as your development environment, but other IDEs can be used as well (we won't be able to support other IDEs however, so select your IDE accordingly).
WARNING: If you use the Open option within the Welcome to IntelliJ IDEA window, you will be able to view the project files, but IntelliJ will not recognize those files as being part of a Maven project and will not import the Ninja framework. Please follow the instructions below to properly import the project.
-
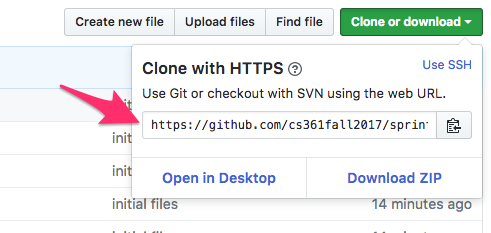
Navigate to the repository page on GitHub (i.e.
https://github.com/user/repo). -
Select the Clone or download button and copy either the HTTPS or SSH URL.
-
Clone the repository to your local system either via a Git UI client or through a terminal. The terminal method would involve launching a terminal window, navigating to the folder/directory that you wish clone the repository files into, and running the command:
git clone url(whereurlshould be the HTTPS or SSH URL). -
Download and install IntelliJ IDEA Community Edition.
-
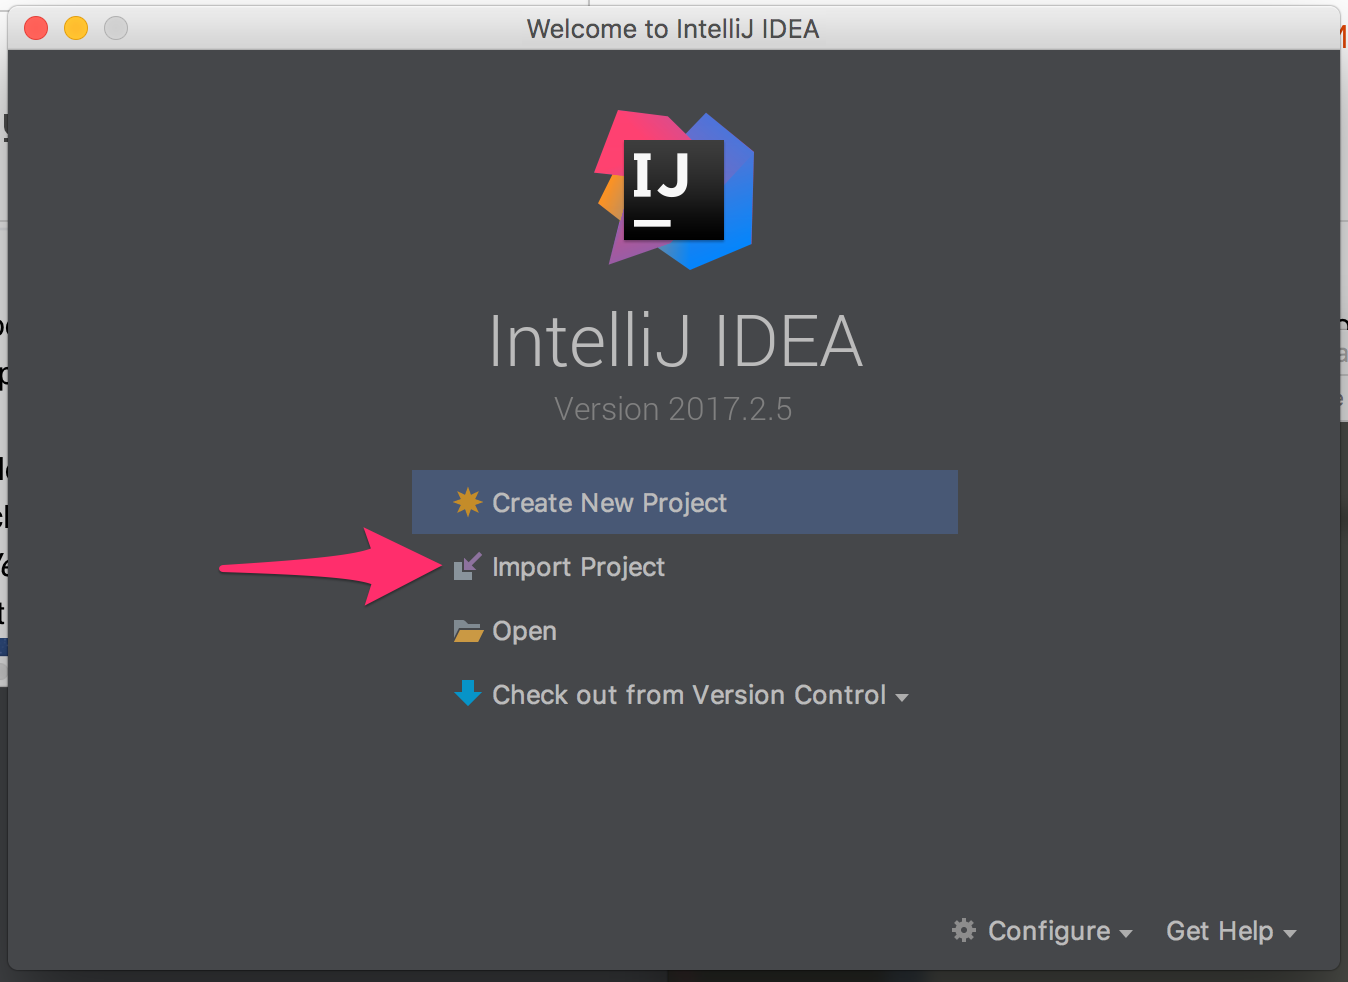
Launch IntelliJ IDEA. The initial launch has configuration steps, complete these as needed, and get to the Welcome to IntelliJ IDEA screen.
-
Select the Import Project option.
-
From the file browser window, navigate to the repository that you cloned to your local system in steps 1-3, and select the
pom.xmlfile within the main project folder. Select theOpenbutton to continue. -
If this is a clean installation of IntelliJ IDEA, you will need to add a Java SDK in order for IntelliJ IDEA to be able to compile Java source code. Typically when loading a new project in IntelliJ IDEA a popup dialog will appear indicating that the project does not have an SDK configured for it; this dialog will all provide options for adding and configuring an SDK for that project.
-
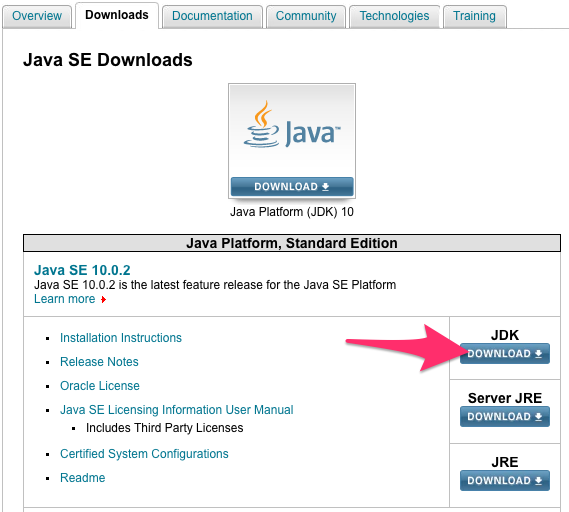
If you do not currently have a copy of the Java SDK installed on your system, you will first need to download and install the Java Platform (JDK) from Oracle.
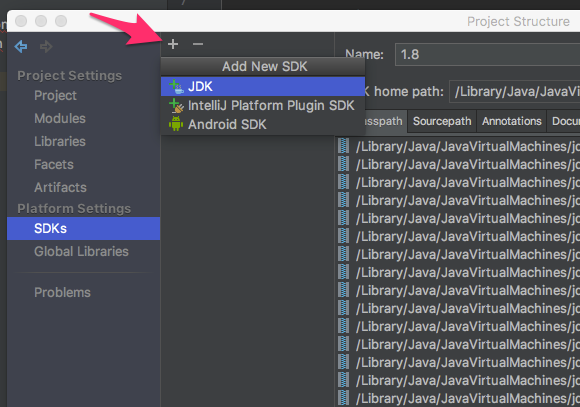
- If the SDK configuration dialog did not appear, or you closed out of it, the appropriate menu for adding a Java SDK to IntelliJ IDEA can be found by going to
File -> Project Structure...and selecting the SDK option under the Platform Settings group on the left-hand side of the window. Select the+icon at the top of the middle pane, and the JDK option.
-
The JDK option will launch a file browser window. Navigate to the location of the installed Java SDK and select the
jdk-10.0.2.jdkfolder (version numbers and the folder name might be slightly different on your system) before selecting the Open button. Note: For macOS users, the Java SDK folder is typically located in/Library/Java/JavaVirtualMachines/. -
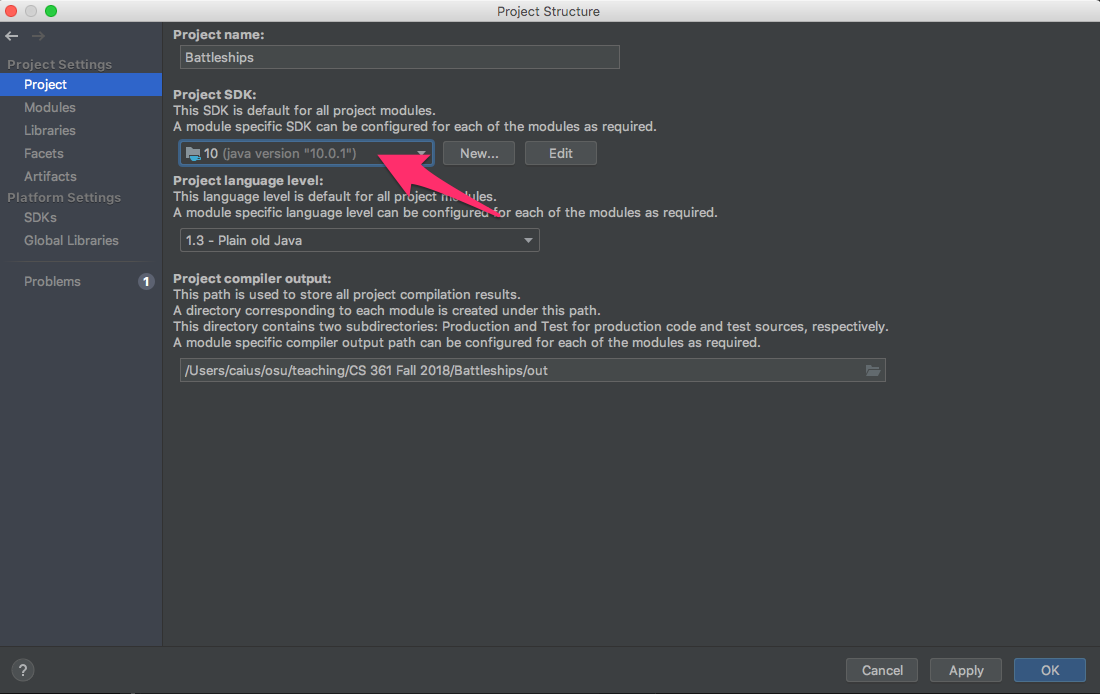
Once added, select the Project option under the Project Settings group on the left-hand side of the window. Select the drop-down menu under Project SDK in the main pane and a
10or similarly named instance of the Java SDK should be available; select it and click OK.
- Your project should now be properly configured for development and use from within IntelliJ IDEA.
Acknowledgments
These intructions were authored by Nicholas Nelson for the Fall 2017 offering of this class.