The IntelliJ IDEA development environment includes the JUnit testing framework for unit testing applications written in Java. JUnit cannot natively test code written in HTML, CSS, or JavaScript, so we cannot use JUnit for testing all components of the CS361 project. The following steps will provide you with a Configuration within IntelliJ IDEA that will Build (compile new copies of library files and project files) and Run (executes the Ninja framework to load your code, then executes all JUnit tests within the project). JUnit executes your app only for the duration of testing, which means that you will not able to access your app via the http://localhost:8080/ address within the browser during testing.
The following steps apply with the project open within IntelliJ IDEA (see Configuring IntelliJ IDEA and Importing Maven-based Projects).
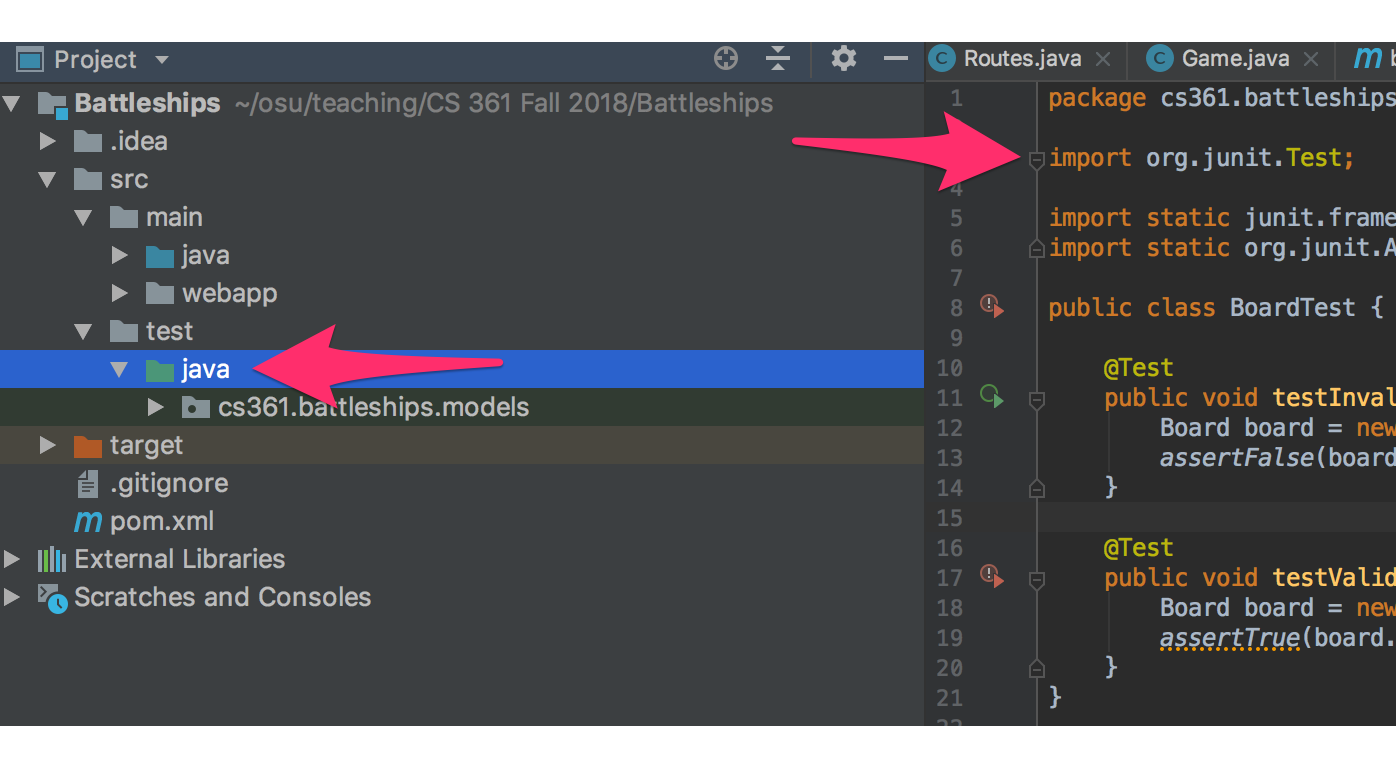
- Verify that your project contains a
src/test/javadirectory that contains at least one*.javafile containing JUnit tests. A JUnit test file can be determined by observing the statement importorg.junit.Testat the top of the file.
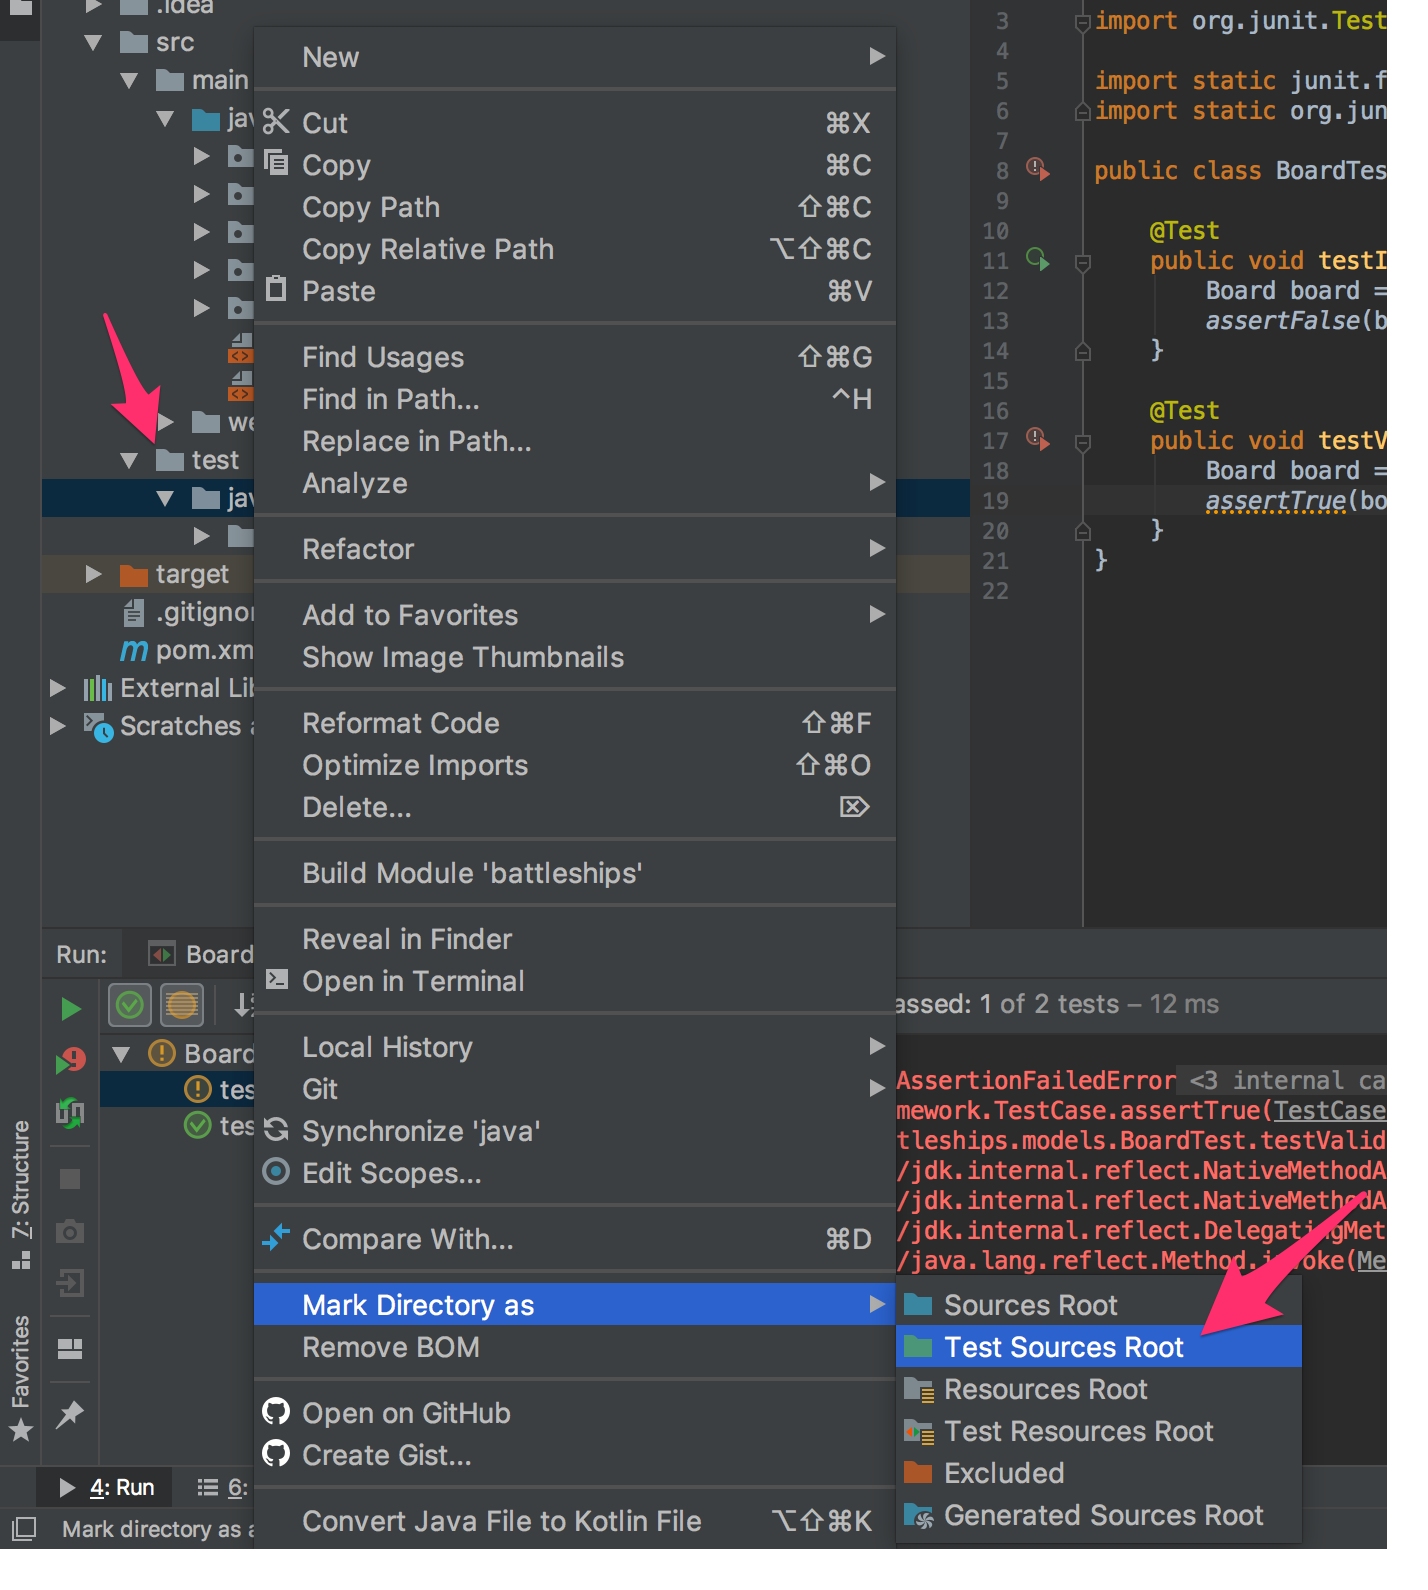
- If the
src/test/javadirectory is not already marked as the Test Sources Root (directory is highlighted in green), then right-click on thesrc/test/javadirectory and select Mark directory as -> Test Sources Root.
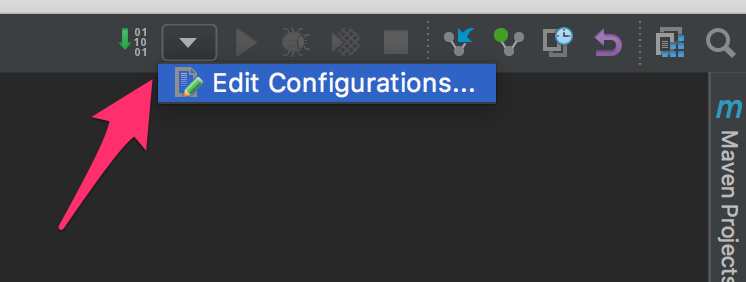
- Open the Edit Configuration menu from the drop-down button in the upper right-hand corner of the window.
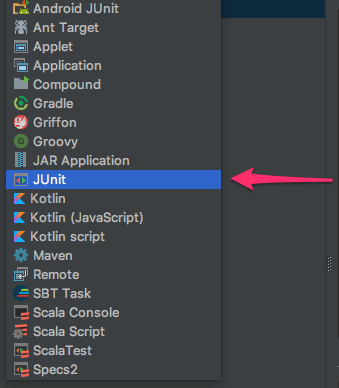
- Within the Run/Debug Configurations window that appears, click the
+button and select JUnit from the drop-down menu.
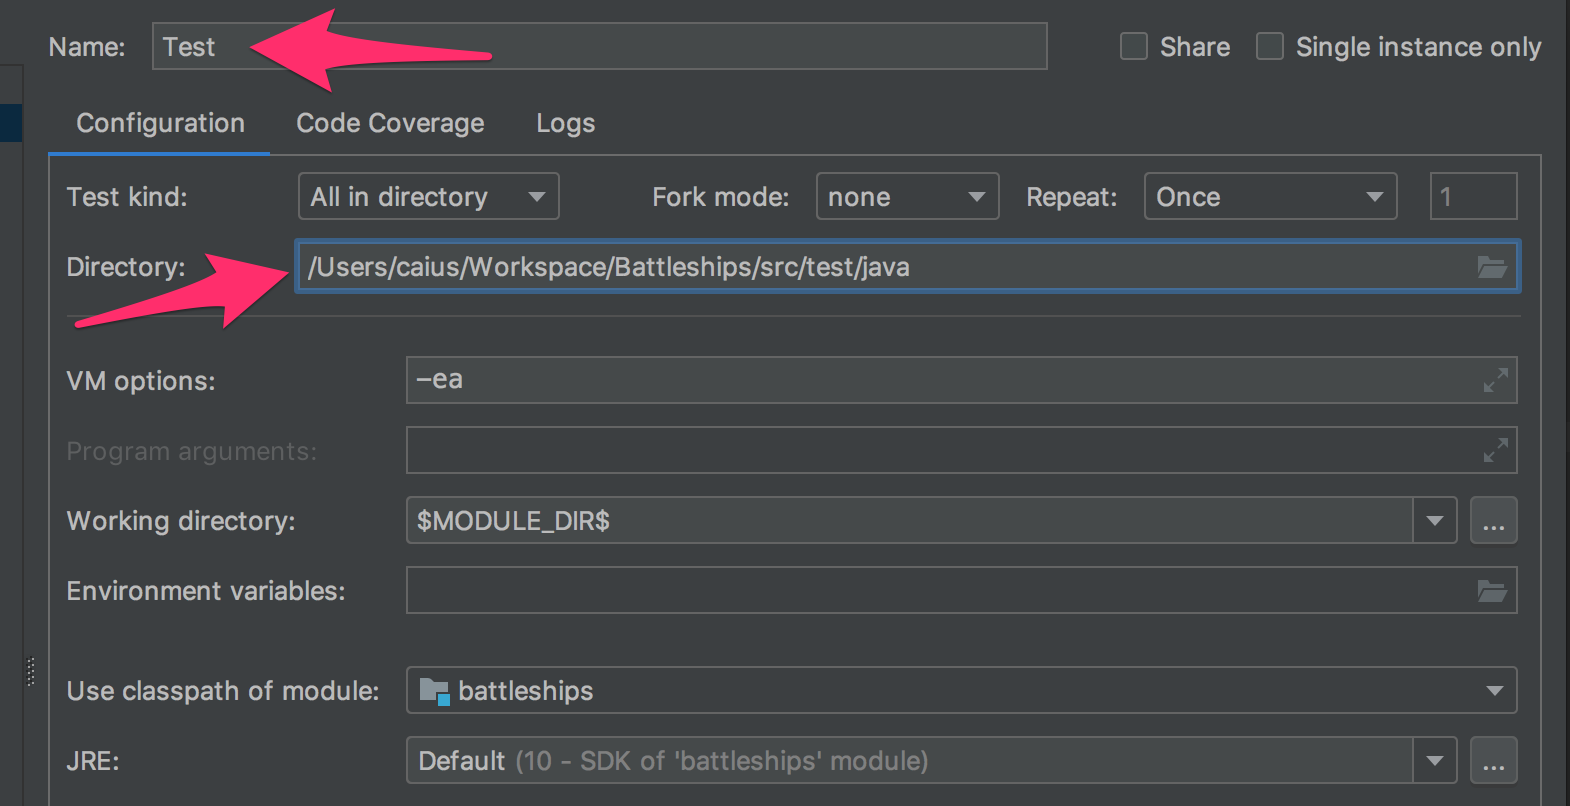
- Enter a name for the new Configuration that we are creating (e.g. 'Test' is given in the example). Within the Test kind field, verify that All in directory is selected. Also, within the Directory field, enter the path to the test directory within your project (e.g.
/Users/caius/Workspace/Battleships/main/test/javain the example).
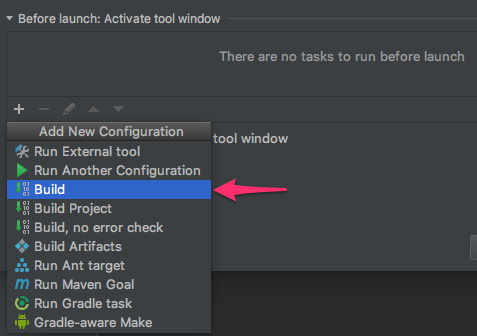
- At the bottom of the Run/Debug Configurations window is a section called Before launch: Activate tool window. Click the
+button and select Build.
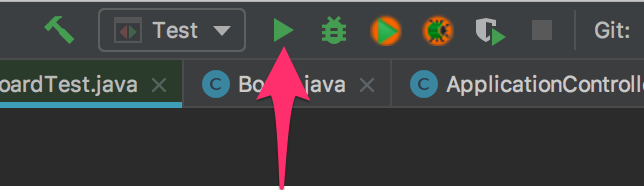
- Everything for your new Configuration should be set, select OK on the Run/Debug Configurations window. You should now see the name of your new Configuration within the drop-down in the upper right-hand corner of the IntelliJ IDEA window. You can run your new Configuration by selecting the play arrow button.
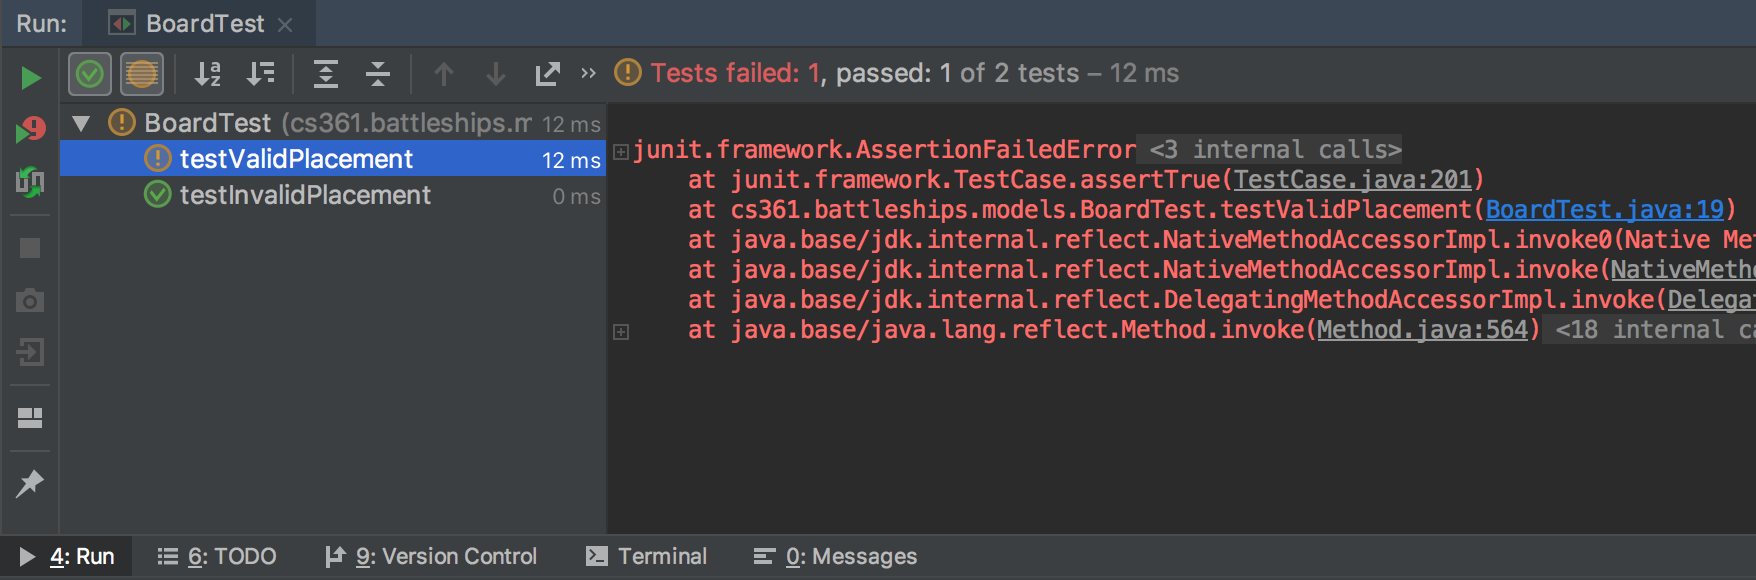
- Once executed, the results of running the JUnit tests will be presented in a new pane at the bottom of the IntelliJ IDEA window. Results with green checkmarks next to them indicate that the test passed, whereas yellow exclamation marks indicate that a test has failed. Any failed tests will include a brief explanation of why it failed within the right-hand side of the pane (e.g. the testPlaceValid was failed the assertion, because the returned value was
false).
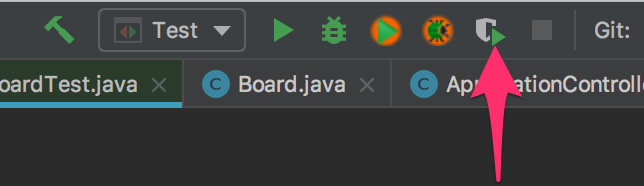
- For determining code coverage, you will need to run your new Configuration by selecting the Run with Coverage button (which appears as a button with the play icon overlayed on a shield).
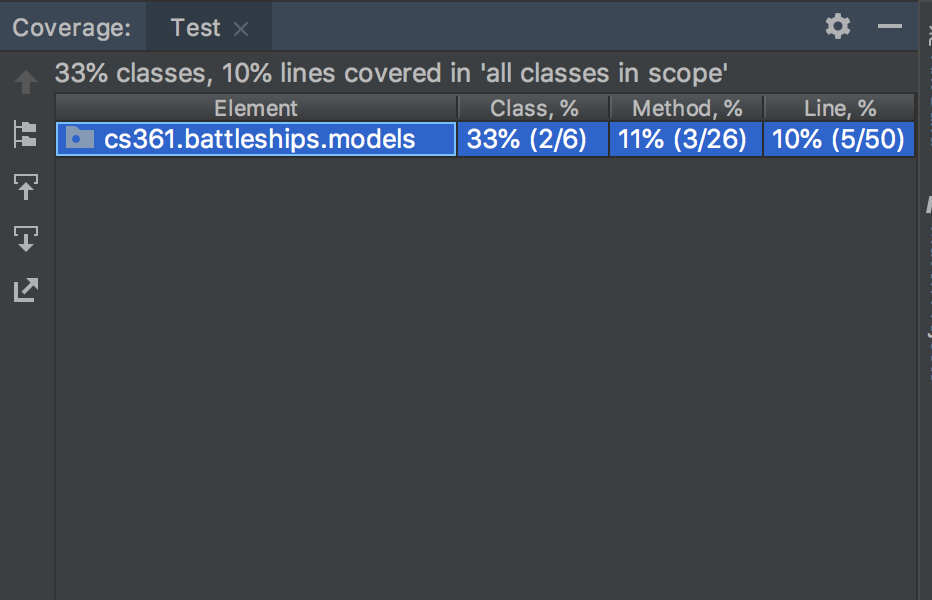
- Once executed, the results of running th JUnit tests will similarly be presented in the test results pane at the bottom of the window. There will also be a Coverage Test pane which contains Class, Method, and Line coverage for each of the directory elements within your project. Please consult the sprint instructions to determine which type of coverage to pay attention to for any particular assignment.
These intructions were orignally authored by Nicholas Nelson for the Fall 2017 offering of this class.